
How to change your DNS on a Windows PC or Mac — and why
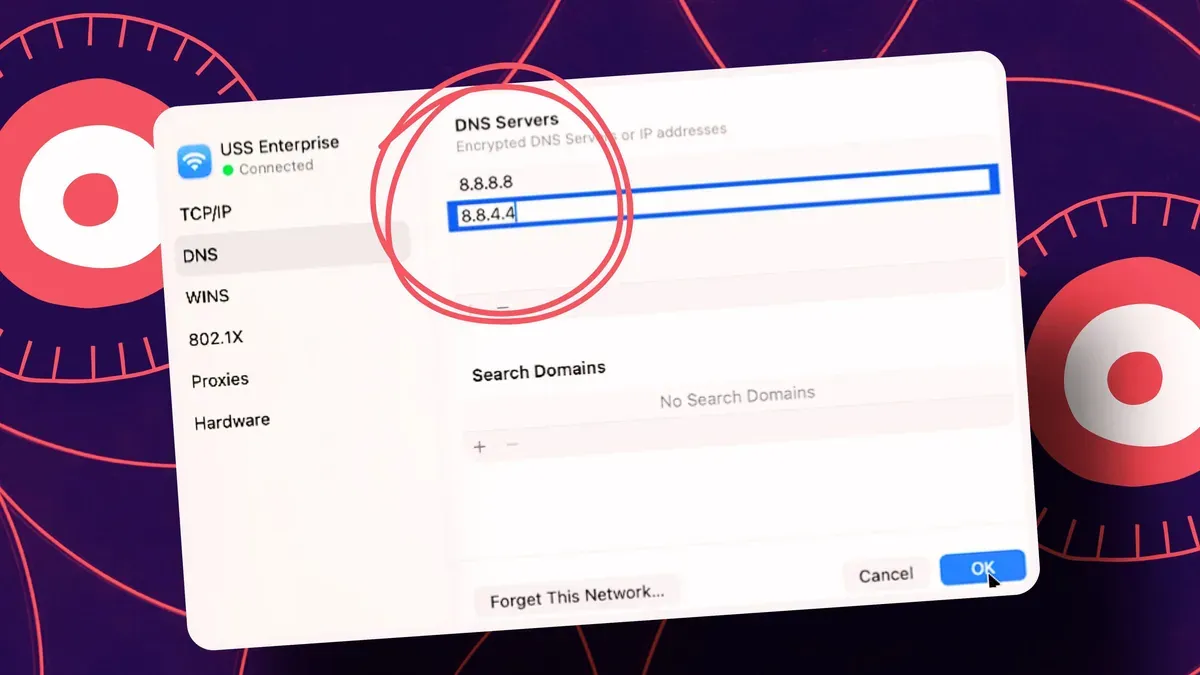
The DNS, or Domain Name System, acts like a phone book for the internet, translating domain names to IP addresses. By default a home Windows PC or Mac uses the DNS provided by your internet service provider, but you can switch to a third‑party service to seek faster performance, stronger security, and tighter privacy.
Popular options include Google Public DNS, Cloudflare DNS, OpenDNS and Comodo SecureDNS. On Windows 11, open Settings > Network & Internet > Advanced network settings, pick Ethernet or Wi‑Fi, then View additional properties. Click Edit for DNS server assignment, change Automatic (DHCP) to Manual, turn on IPv4 and enter the preferred and alternate DNS addresses, then Save.
In Windows 10, go to Settings > Network & Internet > Advanced network settings > Change adapter options, right‑click the connection, choose Properties, select Internet Protocol Version 4 (TCP/IPv4), pick Use the following DNS server addresses and type the preferred and alternate addresses.
dns, domain name, google dns, cloudflare dns, opendns, comodo dns, windows 11, windows 10, ipv4, dhcp